
In this article, we will see everything complete process to create a virtual environment in Anaconda distribution. In the previous tutorial, we have seen how to download and install Anaconda on a Windows 11 machine. If you don’t know anything regarding the creation of a new environment in an Anaconda, don’t worry at the end of this article you will be able to create a new environment in Anaconda.
Throughout this article we are about to cover a total of two ways to create a virtual environment: First is using the Anaconda Navigator Application and second is using the command line interface.
Before going further into this article, I make sure you have downloaded and installed the Python Anaconda distribution on your machine.
Headings of Contents
What is a Virtual Environment in Python Anaconda?
If you are a Python developer then you definitely know about virtual environments in Python. The virtual environment in Python is the same as in Anaconda itself. The virtual environment is a way of isolating the versions of packages that are required for different projects. Python requires different versions of packages for different kinds of applications. The application needs to run on specific versions of packages because they require certain dependencies.
Let me take an example so that you can understand the virtual environment in a better way.
Suppose you have two clients and both clients want to develop their applications and they want different features in their applications. Suppose you are using Pandas for both applications but here is a problem, features of the first client’s application will fulfill using the latest version of Pandas but features of the second client’s application feature will fulfill using an older version of Pandas but this is not possible to use both versions of Pandas in the same environment.
Now you will face problems, To overcome this problem virtual environment came into the picture, you can make two separate Python environments or virtual environments and install an older version of the Pandas package into one environment and the latest version of the Pandas into another environment. Both environments will work independently.
What is Python Anaconda Distribution?
As we know for data science we need various libraries and packages and sometimes It is very active to install and manage all those packages and libraries. Python Anaconda is a distribution that comes with approx 200+ pre-installed packages and applications like Jupyter Notebook, JupyterLab, PyCharm, Spider, etc. which are required for scientific computing or data science. You can treat Python anaconda as a container with pre-installed packages and applications.
Python Anaconda provides a command called conda to interact with Python Anaconda using the command line interface.
let’s see both the ways to create a virtual environment in Python Anaconda.
Anaconda Navigator is a GUI (Graphical User Interface) application that comes with Anaconda distribution. With the help of the Anaconda Navigator application, we can interact with Anaconda. We can launch any type of application using an Anaconda navigator that is required for scientific computing like Jupyter Notebook, JupyterLab, Pycharm, Anaconda Notebook, Spyder, etc. Here we are about to use anaconda navigator to create a virtual environment in anaconda.
let’s see.
Make sure you have downloaded and installed Anaconda Navigator in your system.
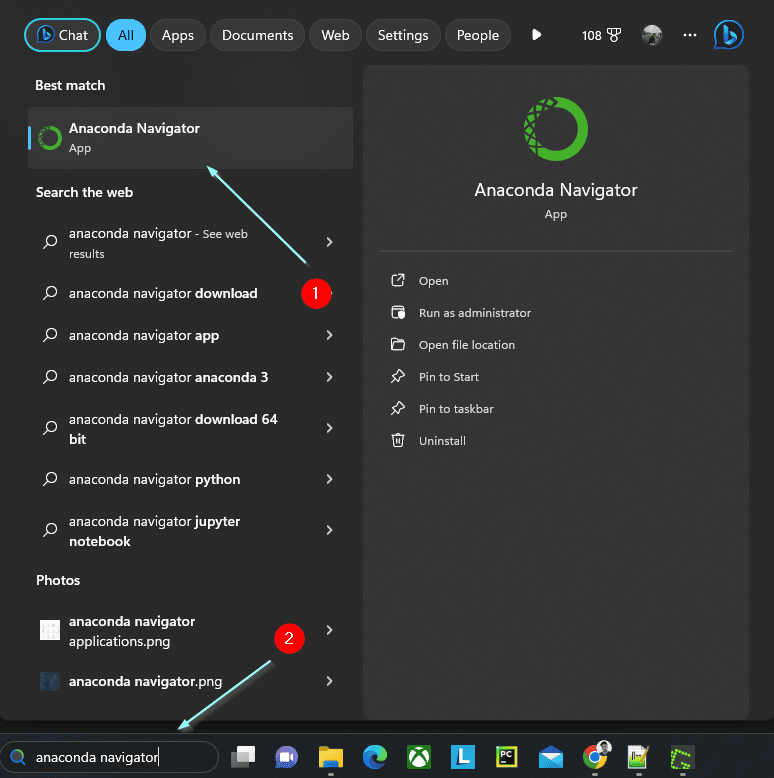
- Search for the Anaconda Navigator app in your window search.
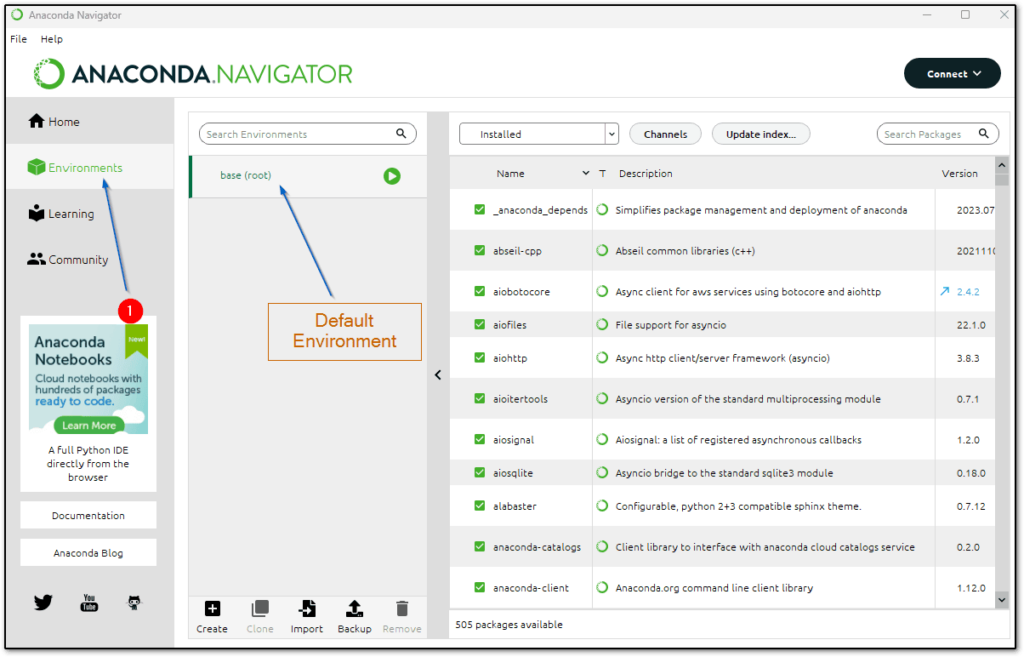
- Click on the Environments tab to see all the Anaconda environments. By default, Anaconda comes with a base environment.
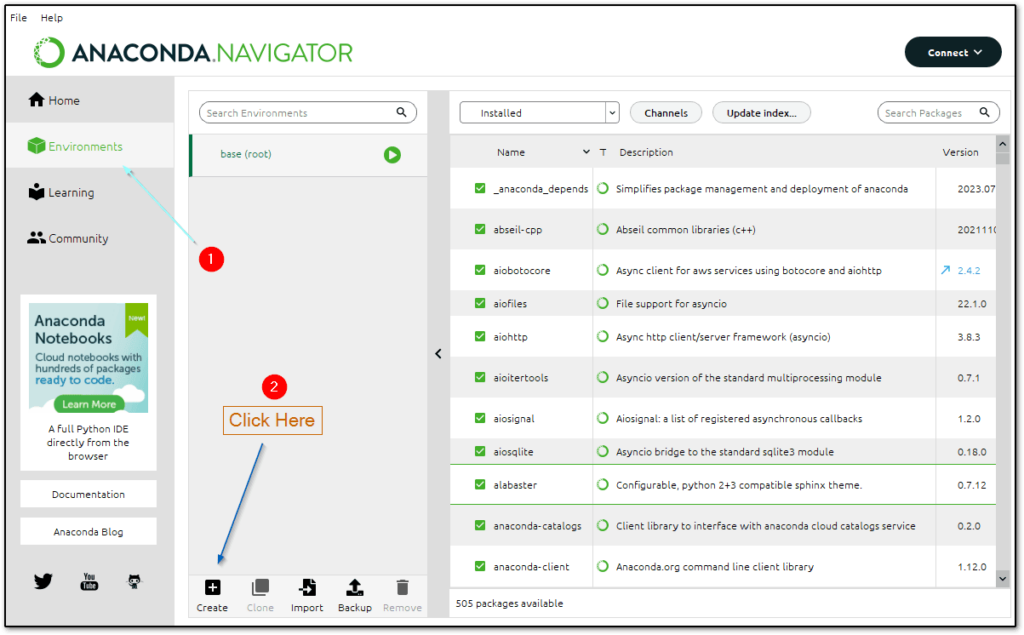
- To create a new environment click on Create under the Environments tab.
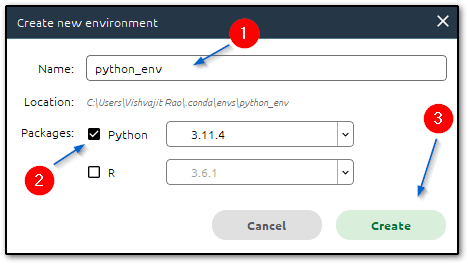
- Now, a dialog box will be opened and you have to provide some information to create a new environment.
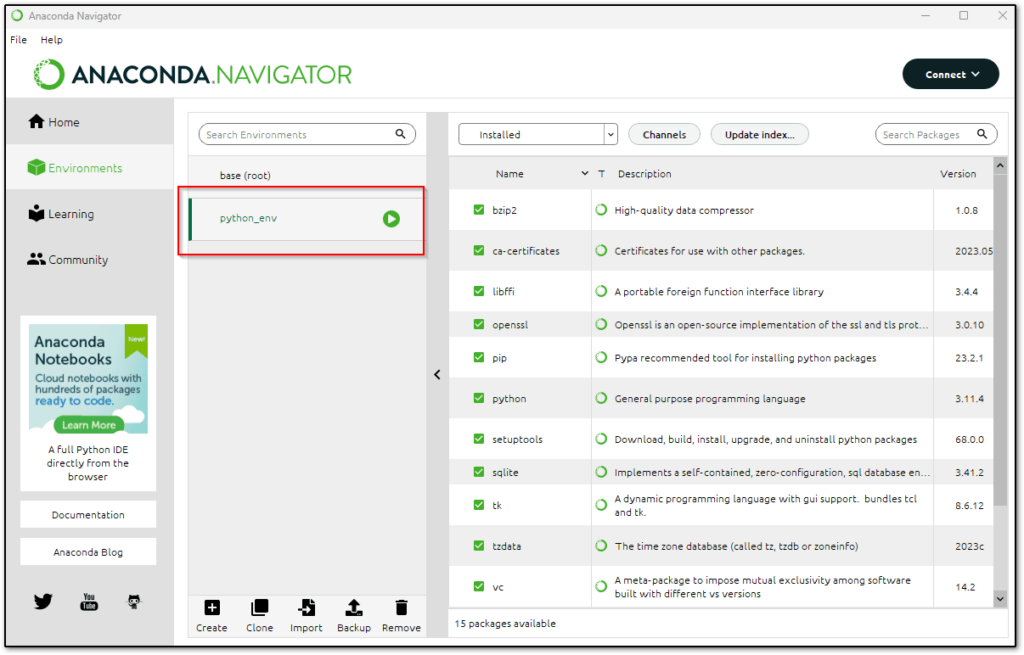
- Give the name of the new environment, In my case environment name is python_env as you can see below.
- Select the Python checkbox and select the version on which you want to create a new environment.
- And finally, click on Create.
- Now this will take some time to create an environment. After successfully creating of environment, you will see all the environments in the Environments section. To activate a particular environment just click on that.
This is how you can use the Anaconda Navigator application to create a new environment.
Now let’s see how we can create a new environment using the command line interface.
Create a virtual environment in Python using the Command Line:
Anaconda provides a command called conda that is used to interact with Anaconda. Here we will use the conda command to create a new environment.
- Open command prompt or CMD.
- Type conda -V to check the conda version. If you are facing the below problem that means your Anaconda path is not properly configured. To configure the anaconda path please follow below given tutorial link.
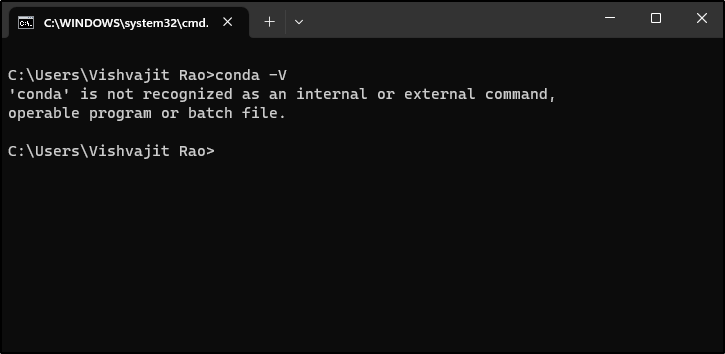
Fix the above problem (Especially How to Add Anaconda Python Path to Environment Variable Section):- How to Install Python Anaconda Distribution in Windows 11
And If the conda version is displayed like below that means Anaconda has been successfully configured and now you are good to go.

- Type
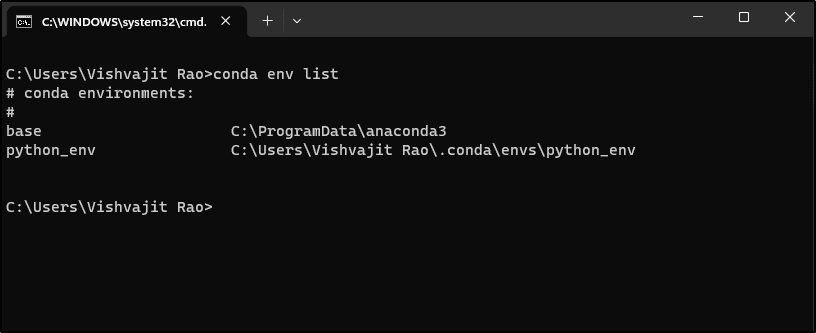
conda env listto display all the existing anaconda environments, As you can see, the earlier created environment python_env is also showing.
- To create a new environment use the below command.
conda create -n anconda_env -y python=3.11 anacondaIn the above command, anconda_env indicates the name of the anaconda environment and 3.11 indicates the version on which the anaconda environment will be created. This command will take some time to finish because it will install various packages in your environment.
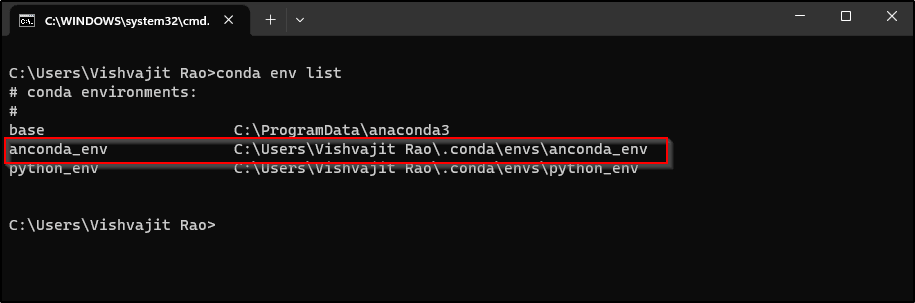
- After creating the environment, You can see the created environment using the
conda env listcommand. You can see the screenshot of all the anaconda environments are displayed.
Activating Anaconda Environment
The motive behind the new environment in Anaconda is to use that environment. To use the environment in Anaconda firstly we have to activate that environment. Let’s see both ways using Anaconda Navigator and Command line to activate the environment.
To activate the Anaconda environment using the Anaconda Navigator application, open the Anaconda Navigator application go to the Environments sections, and choose select environment name that you want to activate, The moment you select the environment Anaconda will start activating that environment.
As you can see in the below screenshot, the python_env environment is activated.
Activate the anaconda environment using the command line:
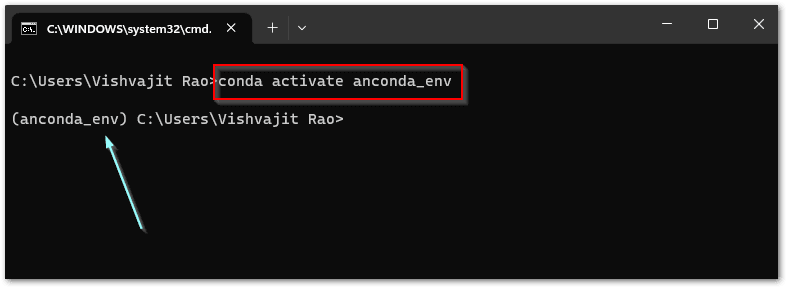
You can activate the anaconda environment using the command line also. As we know anaconda provides a command utility called conda to interact with anaconda. Open the command prompt in your machine and type the below command to activate the Anaconda environment.
In my case, I am activating the anconda_env environment using the command conda activate anconda_env.
This is how we can activate the anaconda environment using the anaconda navigator and command line.
Anaconda Ref:- Creating Environment in Anaconda
Conclusion
In this article, we have seen all about the process of how to create a virtual environment in an anaconda using the command line and anaconda navigator application and also we have explored the process of activating the environment.
After completing the creation and activation of Anaconda environments, you can start using them infect you can install external packages that do not come with Anaconda itself.
To more about Python Anaconda distribution, just bookmark this website because we will come back with new Anaconda topics continuously.
If you found this article helpful, please share it and keep visiting for further tutorials.
Happy Coding…
