Hi there, In this article, you will learn everything about how to install and configure AWS CLI in windows 11 with the help of proper steps. Maybe, you have been using AWS services for a long time by login into the AWS management console but have you think ever, you have another option to use and manage the entire AWS services through a command line interface?
Alright! In this article, I will give complete hands-on of AWS CLI ( Command Line Interface ) to manage the AWS services like S3, EC2, RDS, IAM, etc.
To use AWS CLI, You must have an AWS account, You can see our article to create AWS free tier account.
Before going to further into this article, let’s see a little bit about what is AWS CLI and Why should we use this, Then we will process to install and configure AWS CLI in windows 11.
Headings of Contents
What is AWS CLI ( Command Line Interface )?
The Amazon Web Services Command Line Interface ( AWS CLI ) is an open-source tool offered by AWS, It is used to manage the Entire AWS services through the command line.
To use AWS CLI, you have to perform minimal configuration. After configuration, The AWS CLI enables you to start running commands that implement functionality equivalent to that which is provided by the browser-based AWS management console from the command prompt in your terminal. AWS CLI is available for Windows, Linux, and Mac OS operating systems.
You can say, AWS CLI is a unified tool to manage more AWS services, With just one tool You can configure, Download and control multiple AWS services and automate them through scripts.
let’s see what prerequisites are required to use the AWS command line interface.
Prerequisites to use the AWS CLI:
To access and manage AWS services using the AWS Comand Line Interface, You must have an AWS account and IAM credentials mean the IAM access key and secret key because when you will run the AWS CLI command, AWS CLI needs to have those credentials.
You can follow the below links to create a free tier AWS account and IAM credentials.
Downloading AWS CLI for Windows Machine
This is the first step of setting up AWS CLI ( Command Line Interface ). Here, I am about to download the AWS CLI tool for a windows 11 machine.
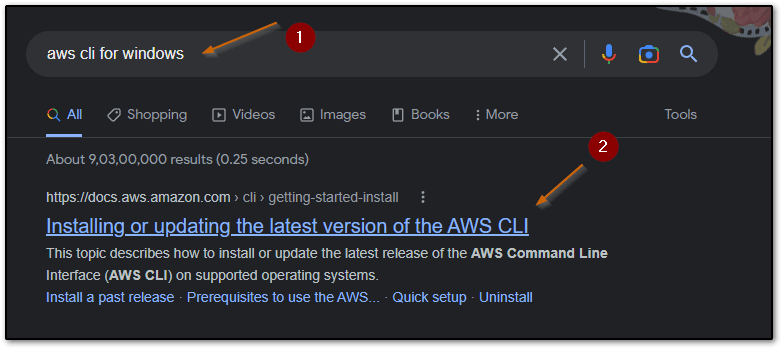
If you are on your pc right now, Just open your favorite browser and type AWS CLI for windows, and search, Click on the first link that is appearing on the google search page otherwise you can click here to get that page directly.
Now There, you will see, A download link of AWS CLI 64-bit will be appearing below the line ‘Download and run AWS CLI MSI installer for Windows (64 Bit)‘ under the Windows section. Click on the download link and save it to your computer.
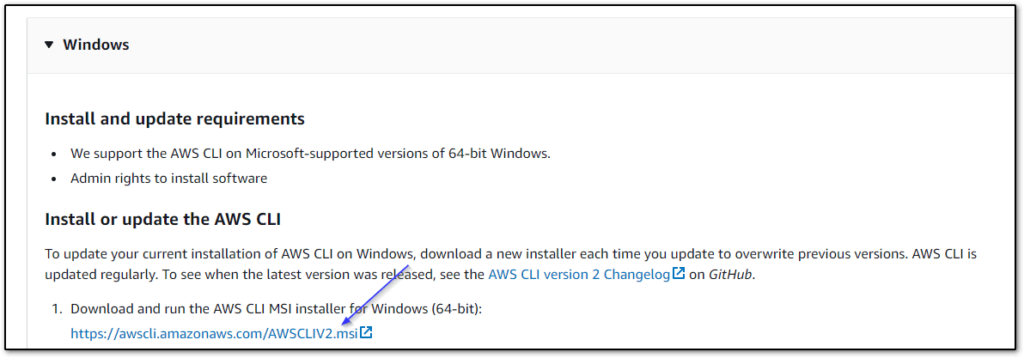
You can also download AWS CLI directly by clicking here.
Now let’s see how to install AWS CLI into the windows operating system.
Installation of AWS CLI ( Command Line Interface )
Make sure, you have downloaded the AWS CLI ( Command Line Interface ) with the help of the above steps that I have mentioned in the Downloading AWS CLI for Windows Machine section.
To install AWS CLI in windows, follow the steps that I have given below.
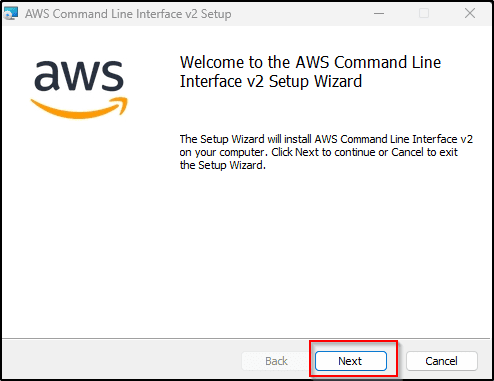
- Click on the downloaded AWS CLI ( Command Line Interface ) .msi file to install. Click on Next.
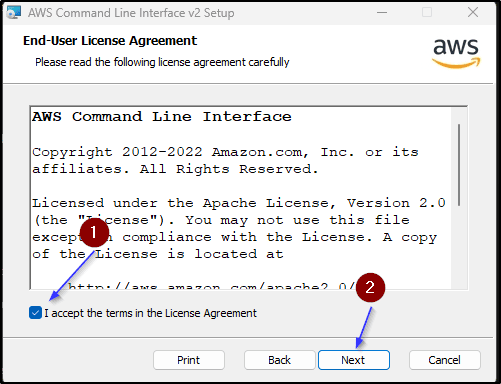
- Accept the license agreement by enabling the checkbox and clicking on Next again.
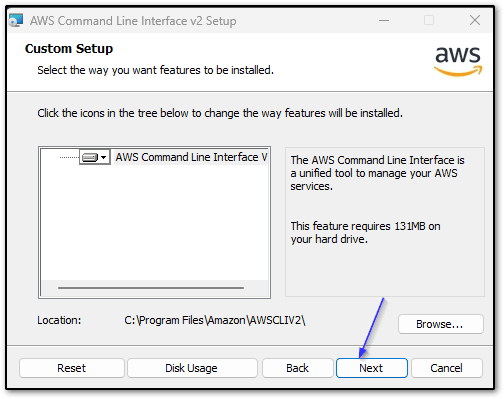
- Here, You can choose a location where you want to install AWS CLI by clicking on the Browser button but I haven’t chosen a location and have gone with the default location as you can see below, and Click on Next.
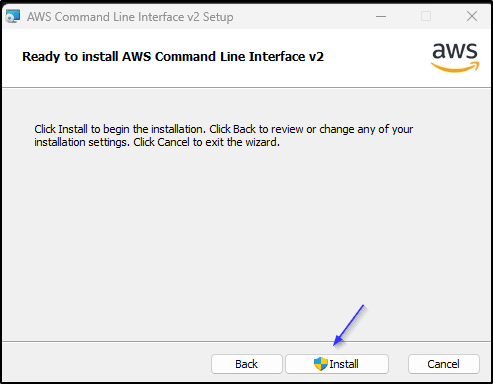
- Click on the Install button to start the installation process.
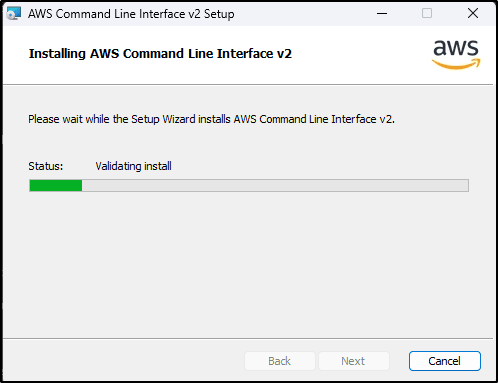
- Now, it will take some time to install as you can see in the below image.
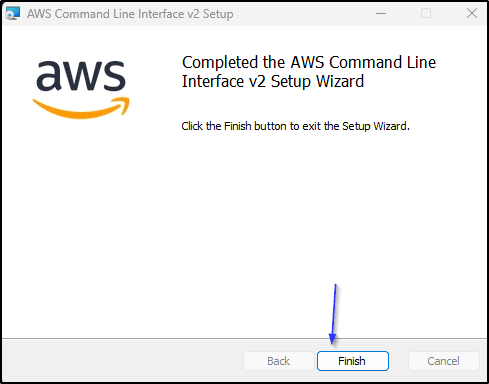
- Once the installation will be done, Click on the Finish button to exit the setup wizard.
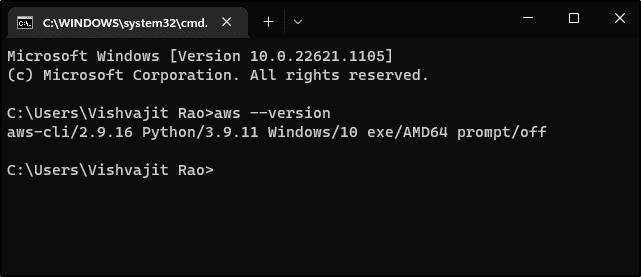
Now, How will you know whether AWS CLI has been installed on your machine or not? To check, Open the windows command prompt and type aws –version to see the installed AWS CLI version, If You are able to see a version of AWS CLI that means, It has been installed successfully on your machine as you can see in below image.
Checking the version of AWS CLI:
Configuration of AWS CLI ( If you are using the first time )
So far, we have seen how to download and install AWS CLI for windows machines but without the configuration of AWS CLI, We can’t interact with AWS Services. To interact with AWS services through the AWS CLI we have to create an IAM user with programmatic access along with a set of permissions.
To configure AWS CLI, I will break this part into two sections First and Second, In the First section, we will see the process of creating an AWS IAM use with programmatic access and in the Second section, we will see the process of configuring the AWS CLI. I am assuming you have created an AWS free-tier account.
First Section
Just follow the below steps to create an IAM user.
- First login into the AWS Management console using root user credentials.
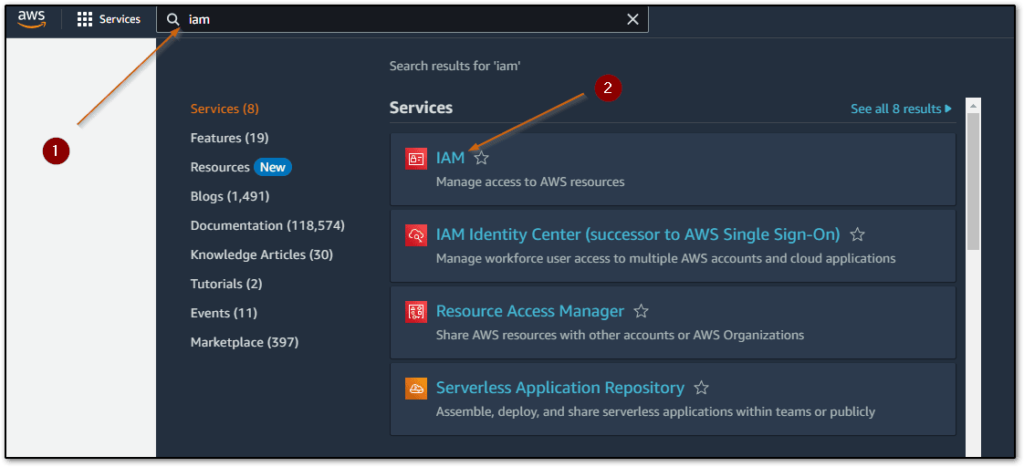
- Search for IAM ( Identity Access Management ) in the search box and click on IAM.
- Click on the Users tab displayed on the left side of the window.
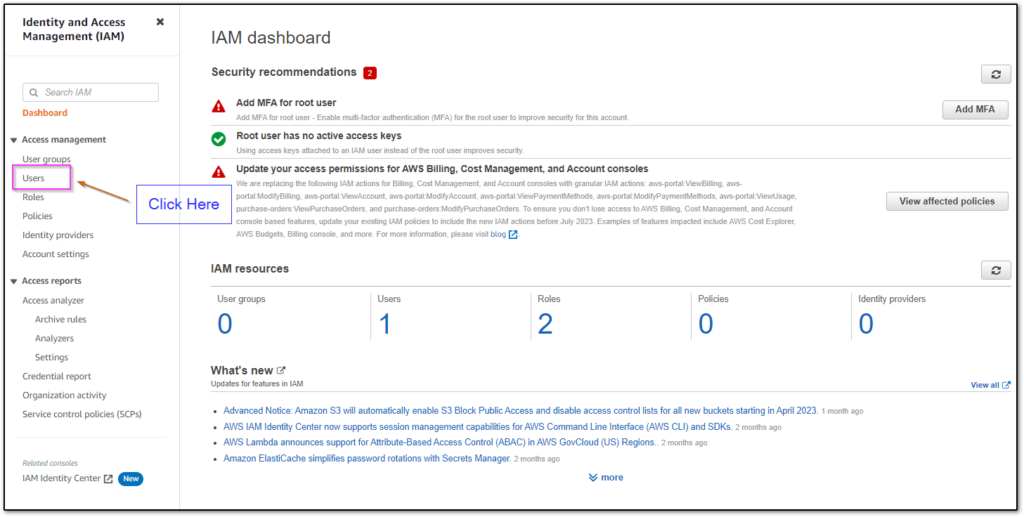
- Click on Add users tab to create a brand new IMA user.

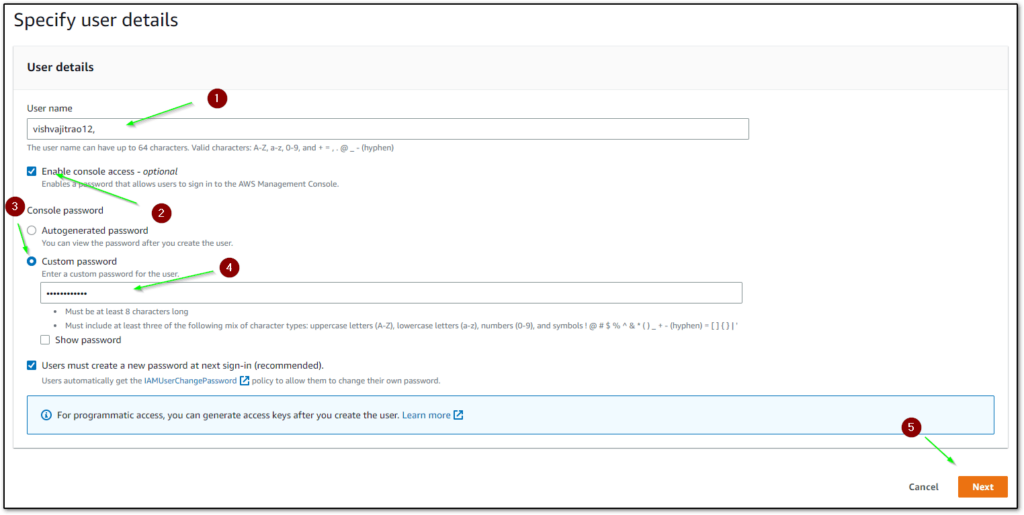
- On this page, You need to specify the following things.
- Specify IAM Username.
- Check the Enable console access – optional checkbox (if you want to use this user to login into AWS Management Console ).
- Enter the password for this IAM user. ( Will enable only if the above option will check )
- Re-enter password.
- Click on Next.
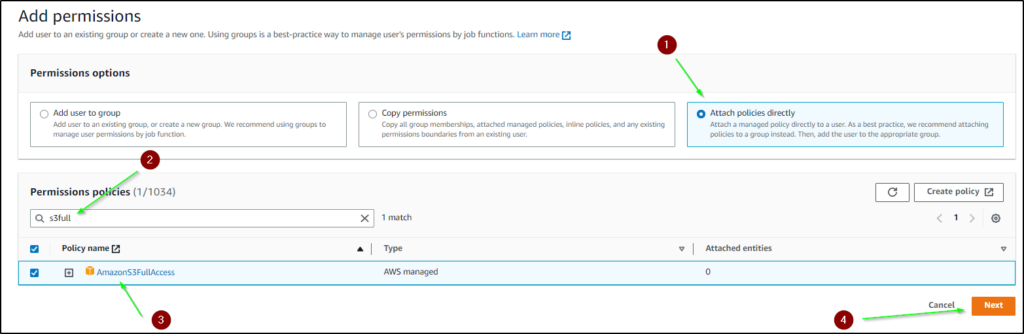
- Click on attach Attach policies directly and search for s3full in the search box and checkbox to the AmazonS3FullAccess policy and click on Next.
AmazonS3FullAccess:- It is an S3 full access policy that gives this IAM user full access of S3 ( Simple Storage Services ).
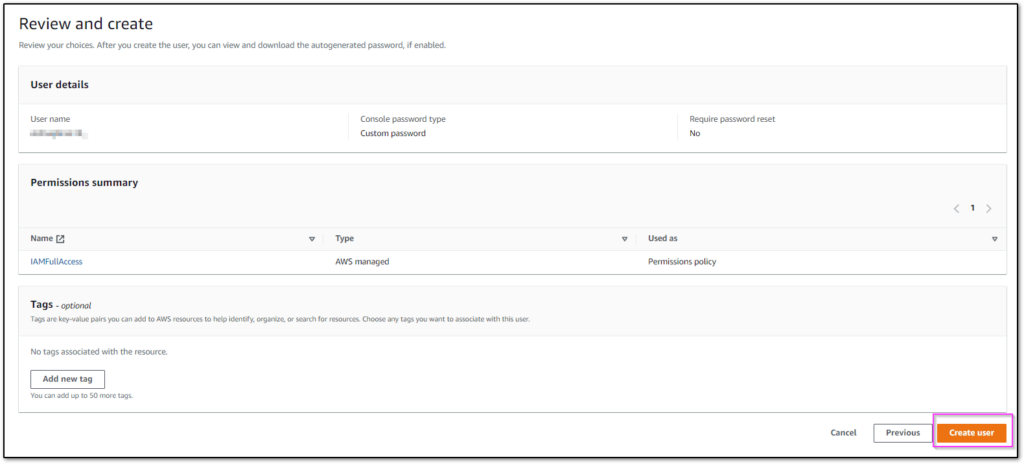
- Now, A window will appear along with IAM user details, Just review all the details that you have provided previously. If all the things are good to go then click on Create user otherwise you can go back by clicking on the Previous button and correct all those details that are wrong.
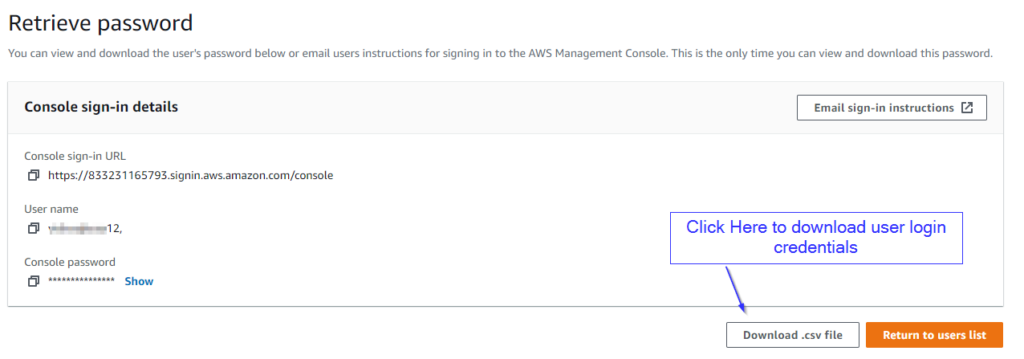
- In a few seconds, the IAM user will be created successfully, Click on the Download .csv file to download login credentials for this user.
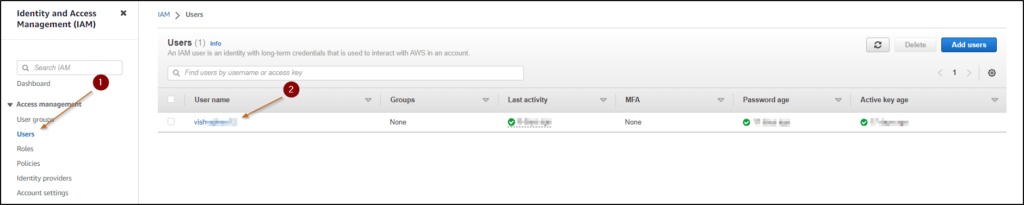
- Now, we will have to create an access key and secret key for this user so that we can configure it for AWS CLI ( Command Line Interface ).To create, click on the Users tab in the left panel and then click on the IAM username that is created earlier.
- Now, Click on security credentials.

- Click on Create access key.

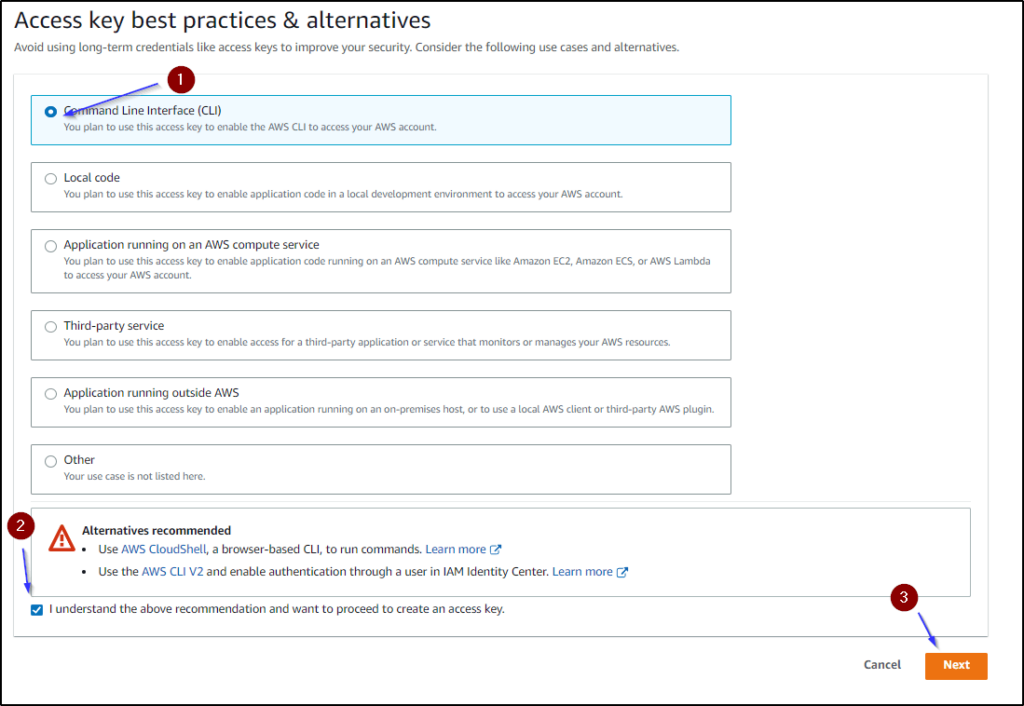
- Choose the Command line interface and checkbox the “I understand the above recommendation and want to proceed to create an access key.” option and then click on Next.
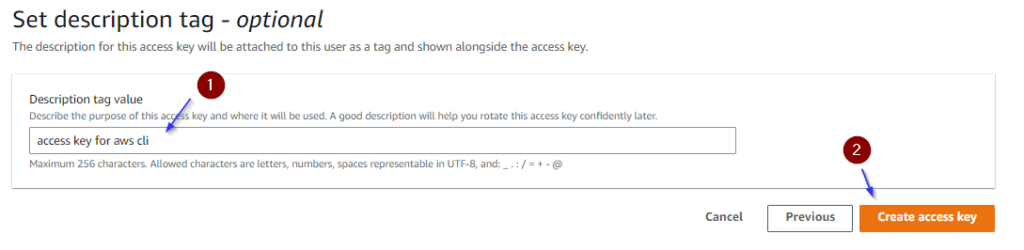
- Provide a description tag for this access key, You can omit it because it is completely optional. Click on Create access key.
- In a few seconds, the Access key and secret key for this Iam user will be created. Just click on the Download .csv file to download the access key and secret key.
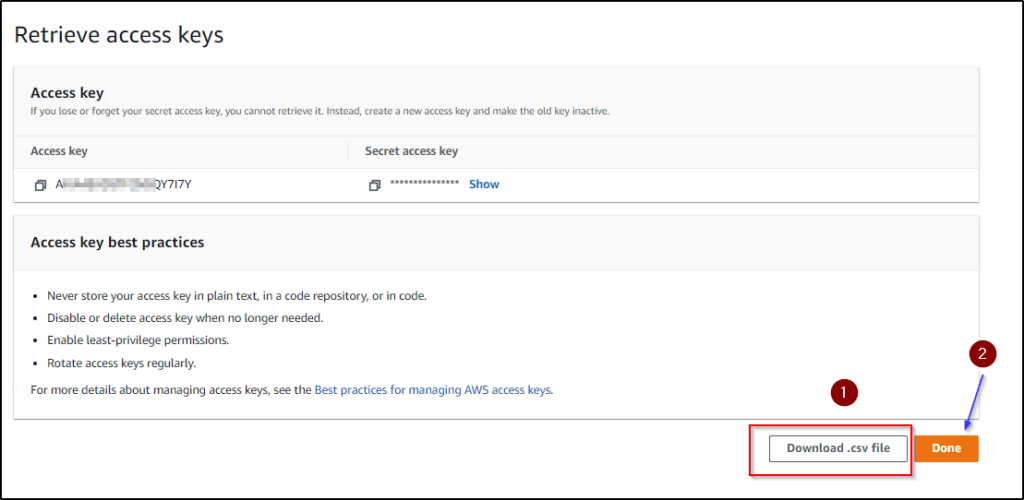
Note:- Please don't share this access key and secret key with anyone.
Creation of AWS IAM User has been completed, Now it’s time to configure AWS CLI for this user. Please follow the second section.
Second Section:
In this section, We will see the process of configuring the AWS CLI ( Command Line Interface) to interact with AWS services through a command line.
I hope, you have successfully installed the AWS CLI in your computer system by following the above steps described in the Installation of AWS CLI (Command Line Interface) section.
Now, let’s configure the AWS CLI. Please follow the below steps to configure.
To configure AWS CLI, You should have an Access key and Secret Key. The access key and secret key will be included in the CSV file that you downloaded during the creation of the IAM user in the above steps.
let’s configure
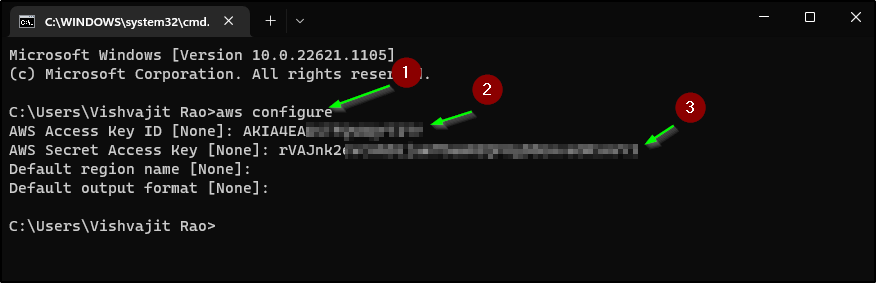
Open your window command prompt and type AWS configure command.
- Enter the access key from the CSV file and hit enter.
- Enter the secret key from the CSV file and hit enter.
- Leave the region name blank and hit enter. By default is us-east-1.
- Leave the output format blank and finally hit enter. By default it is JSON.
Now, AWS CLI has been configured successfully, it is time to verify whether it is configured properly or not.
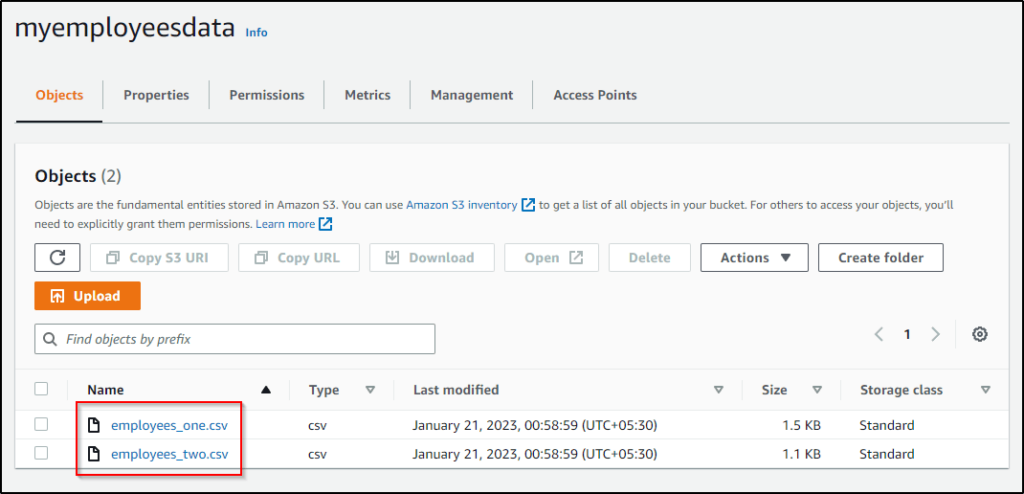
To verify, I have manually created an AWS S3 bucket called myemployeesdata and uploaded some files inside this bucket and now I am about to display the bucket name and all those files using AWS CLI ( Command Line Interface ).
You can see the below screenshot, There are two employee files that I have uploaded inside myemployeesdata S3 bucket.
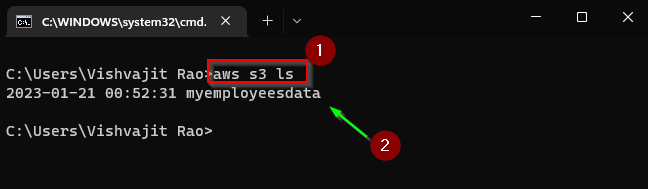
Displaying Bucket Name:
To display only the names of the buckets, I am using the s3 ls command.
Displaying objects of the bucket:
To display objects ( files ) of the bucket name, I am using the ls command along with the bucket name.
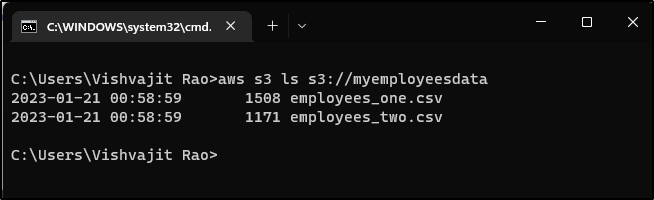
Note:- Bucket myemployeesdata will be relaced with your bucket name.
As you can see, How I have displayed all the files from bucket myemployeesdata using AWS CLI ( Command Line Interface ).
Summary
So this is how you can download and configure AWS CLI in Windows 11, In fact, this tutorial will also work for other windows operating systems like 8, 10, etc.
I hope, the process of downloading, installing, and configuring AWS CLI ( Command Line Interface ) was simple and straightforward. After configuring AWS CLI ( Command Line Interface ) you can easily interact with most of the AWS services through the window command line.
If still you are getting confused regarding the setup of AWS CLI ( Command Line Interface ), please again read this article and try to follow all the steps. Don’t skip any section.
You can check out this AWS CLI command line tutorial to explore tutorials about AWS services commands.
👉 AWS CLI ( Command Line Interface ) Commands Reference:- Click Here
If you found this article helpful, please share and keep visiting for further interesting AWS tutorials.